Summary:
Want to make a reaction video for YouTube? Then check out the post where you can find a thorough tutorial on how to make a reaction video along with 5 great tips that you can leverage to avoid YouTube copyright claims while doing the reaction video.
Which one do you prefer: watching Brazil win the 2022 FIFA World Cup, or watching people watching the Brazil team win? Reaction videos are a decade-old phenomenon on the internet. Pioneered by the Fine Brothers YouTube Channel, this genre has seen its rise notably after the pandemic. And with millions upon millions of people tuning in to watch these videos, added by the minimal production requirements, creators start to trawl online for tutorials on how to make a reaction video. Thus we have written a complete tutorial here explaining how to do reaction videos on the Phone and PC for YouTube and other video streaming platforms.

What Is a Reaction Video
A reaction video is a video that features someone recording their spontaneous reactions while viewing series episodes, film trailers, music videos, football games, etc. Beginning in around 2007, the reaction video is described as encapsulating the 'fundamental experience of the internet' and has slowly become a staple of services like YouTube. It is said that people watch these videos because they enjoy the emotional association of seeing those on screen react to content the same way they would, or literally, a seeking-out of connection. Moreover, these videos can also help one discover new content, spotting shows to watch after combing through YouTubers' reaction videos.
Some top reaction videos formats/ideas include:
- Video game reactions.
- Music video reactions.
- TV show/movie trailer reactions.
- React to iconic World Cup moments.
- React to different challenges.
- React to the video comments.
- React to the 'reaction video'.
- ...
Yet how to do a reaction video exactly? No worries! Read through and you will find all the answers.
How to Make a Reaction Video
We break the tutorial down to 3 parts so that you can grasp an end-to-end insight of how to do the reaction videos:
1. Pre-Making: Reaction Videos Preparation
A great reaction video is built majorly through your recording process, rather than the post-processing, and thus planning out everything in advance could enrich your project. Below are 4 essential tips that you can leverage in your creation:
- Figure out what to react to, and it is best not to react to something that you have already seen.
- Design the format, for instance, whether you expect a partner to join in your reaction video, or just record on your own.
- Use your voice to set the vibe and include a catchy intro for your video; make sure your reaction is candid and animated.
- Set up your recording gear, lights, and the background, check the audio level, and the environment is quiet.
2. While-Making: How to Record a Reaction Video
There is no need for a piece of fancy recording equipment while making an expressive reaction video as sometimes lightening up your gear can even expedite your work. And this is what VideoProc – a one-stop solution for doing reaction videos - is adept at.
Featuring two major products in its service, VideoProc, on one hand, is backed by VideoProc Converter AI as the video processing solution, whose screen recording engine has yet to find a rival in the field, and for another, its VideoProc Vlogger, a non-linear editing program, helps to add more customized definition to your reaction video recording. And in the following section, we will show you how to make the most out of the two programs to record and edit your reaction videos.
1) Record a Reaction Video with VideoProc Converter AI
With a total of four recording modes, the built-in media screen recorder of VideoProc Converter AI allows you to easily capture the entire or partial 4K computer screen, record video from your facecam, or record screen activities and the webcam simultaneously. Also included is the chroma key function that enables you to insert a separately filmed background footage or another static image to create a seamless composite.
Note: The Windows version now supports AI-powered Super Resolution, Frame Interpolation, and Stabilization to enhance video and image quality. These AI features are not yet available in the Mac version but will be coming soon.
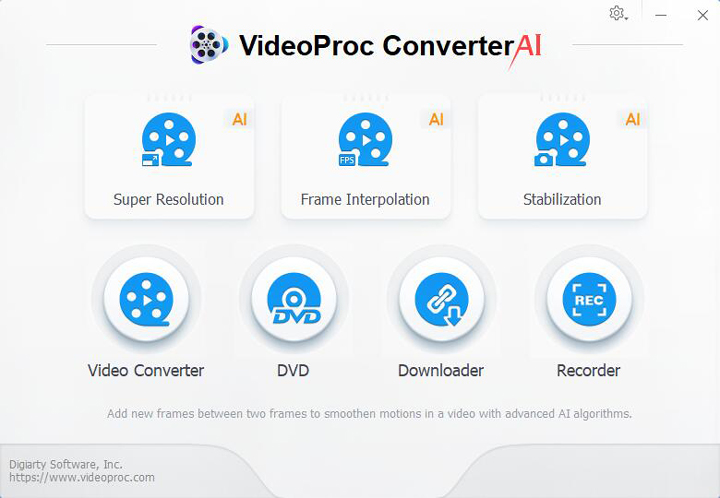
Step 1. Download and launch VideoProc Converter AI on your computer, and navigate to the Recorder panel.

Step 2. Select Screen & Webcam mode, and pick either 'record screen while showing webcam' or 'record webcam while showing screen'.

Tips:
- Check out the wheel-shaped icon on the top right, where you can further your recording adjustment, including video quality, format, location, etc.
- Enable the audio devices so that the recorder can capture both the computer and microphone sound.
- Use the Crop tool to record only a part of your screen.
Step 3. Click Rec to start recording the screen activities and the video from your facecam.
Step 2. When the recording ends, hit Stop or use the shortcut Ctrl+Alt+Shift+R to stop recording.
2) Record a Reaction Video with Your Phone
For those who don't have a web camera, you can use your phone camera instead to record your reaction.
As the computational power of smartphones allows sophisticated image enhancement in real time, videos taken on modern smartphones are edging ever closer to the quality once reserved in the costly lens cameras. Thus using the smartphone camera to record your reaction video would also be a decent idea.
Step 1. Set up your phone on your desk, and open the camera tool.
Step 2. Run VideoProc Converter AI on your computer, and go to the Record panel > select Screen as your recording mode.

Step 3. Once everything is ready, start recording your screen activities as well as your reaction.
Step 4. When finished, hit Stop in both your phone camera and VideoProc Converter AI.
Note: VideoProc Converter AI comes with robust AI features, allowing you to AI upscale video, apply frame interpolation, and stabilize video to achieve the best results. You can access these features on the home page to elevate your recording.
3. Post-Making: Tips to Edit a Reaction Video
Though the key behind a great reaction video mainly lies in the recording process, taking advantage of the post-making process could help to spice up your content.
In addition, if you record your reactions and the screen activities in two different devices, you then need a capable video editor to piece them together. And here we'd like to share with you some of the top pro tips that you can tap into when editing your reaction video:
- Design the layout (PiP or Split-Screen): deciding how you wish to present your recording clips - either in the picture-in-picture form or using a split-screen template - is crucial and the right image layout helps to translate your expression and emotion to the viewers.
- Synchronization: since the reaction video shows you reacting to something, it is pivotal to ensure that your reaction is in parallel with what's going on in the activity you react to, notably for the footage taken using different devices.
- Use trim and cut: get rid of the segment that you don't feel relevant, and eliminate spaces where not much is happening.
- Apply effect/presets/transitions: as the post-editing part is a remedy for the imperfection shots you left off in the recording process, utilize the effects & transitions presets to cast the magical spells.
- Add background music if necessary.
This brings up the ultimate point: Is there any video editing software that is easy to access and at the same time could fulfill all your needs to do a reaction video and even better if it is free? Then check out VideoProc Vlogger – a free dedicated non-linear video editor designed for both beginners and pros to unleash the video potential and boost your creativity.

VideoProc Vlogger – Create and Recreate Your Reaction Video in a seamless workflow
- Edit your reaction video with split screen, green screen, PiP, stylish transition, etc.
- Enhance the visual effect with speed ramp, motion crop, effect presets color grading, and beyond.
- Get full control of your reaction video with frame-to-frame timeline editing.
- GPU acceleration to ensure the lightning 4K editing speed.
How to Avoid Copyright Claim on YouTube Reaction Videos
The rise in popularity of reaction videos on YouTube has resulted in controversy for various reasons, with the most prominent one being the copyright claim. YouTube Copyright strikes can spell disaster for any content creator, and even render the channel subject to termination.
Thus to make a reaction video without getting slammed by YouTube copyright claims, you can either get permission from the original video creator which can be hectic and time-consuming, or try to ensure the video stays within the fair use law, the law that allows the limited reuse of the copyright-protected material under certain circumstances without getting permission from the copyright owner.
And to that end, keep in mind the following tips when including other people's materials in your reaction video:
- Make your content transformative: transformativeness is the key, and make your video as transformative as possible.
- Give credits to the original creator: attribute the video or audio clip you are using to the original creator, but this would not completely protect you from a copyright claimer.
- Keep what you use short: as one of the four factors in determining fair use is how much material is used concerning the copyrighted work, it is suggested to include just bits of the original work instead of using it entirely.
- Work on the audio of the source video: you can choose to either change the pitch, bring the volume of the music scene down a lot, or mute the clip entirely and put your commentary over it, which will make it much harder for YouTube to detect copyright infringement.
- Refer to the YouTube Audio Library.


